
In Windows Server, the Windows Firewall serves a similar purpose as it does in Windows client operating systems. However, in a server environment, the Windows Firewall is a critical component for securing the server against unauthorized access, network-based threats, and potential security vulnerabilities.

Table of Contents
Key aspects of the Windows Firewall in Windows Server include:
Protection against Unauthorized Access: The Windows Firewall acts as a barrier between the server and external networks, controlling incoming and outgoing traffic based on predefined rules. It helps prevent unauthorized access to the server by blocking potentially harmful traffic.
Inbound and Outbound Rules: Similar to the client operating system, administrators can configure inbound and outbound rules to allow or block specific types of traffic, ports, protocols, or IP addresses.
Profiles for Different Network Types: Windows Server allows administrators to set different profiles (such as domain, private, and public) with distinct firewall settings suitable for various network environments.
Customization and Configuration: Administrators can create custom rules to define which services or applications are permitted to communicate over the network. This customization allows for fine-tuning security settings based on specific server requirements.
Integration with Server Manager and PowerShell: Windows Firewall settings can be managed through Server Manager’s graphical interface or via PowerShell commands, providing flexibility and ease of administration for system administrators.
Logging and Monitoring: The Windows Firewall in Windows Server includes logging and monitoring capabilities, allowing administrators to track and analyze network traffic, security events, and firewall activities for auditing and troubleshooting purposes.
Group Policy Management: Windows Server leverages Group Policy for centralized management of Windows Firewall settings across multiple servers in an organization. This allows administrators to enforce consistent security policies throughout the network.
Securing a server environment is paramount for maintaining the confidentiality, integrity, and availability of critical data and services. The Windows Firewall, when properly configured and managed, plays a crucial role in enhancing the security posture of Windows Server installations by controlling network traffic and minimizing potential security risks.
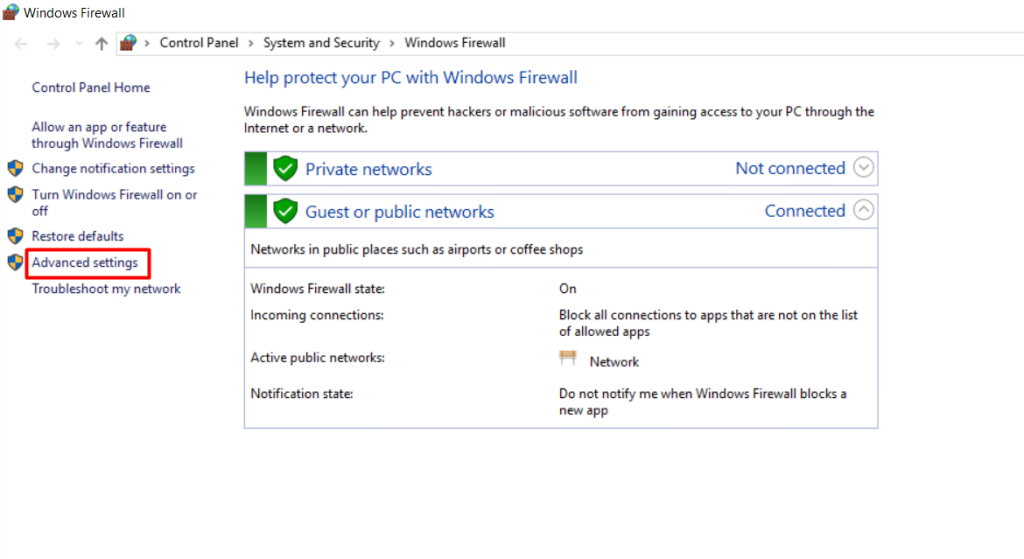
To add an IP address to the Windows Firewall, you can use the Windows Defender Firewall settings. Here’s a step-by-step guide:
Access Windows Defender Firewall Settings:
Go to the Start menu and search for “Windows Defender Firewall.” Click on it to open the Firewall settings.
Navigate to Advanced Settings:
On the left-hand side of the window, click on “Advanced settings.” This will open the Windows Defender Firewall with Advanced Security window.
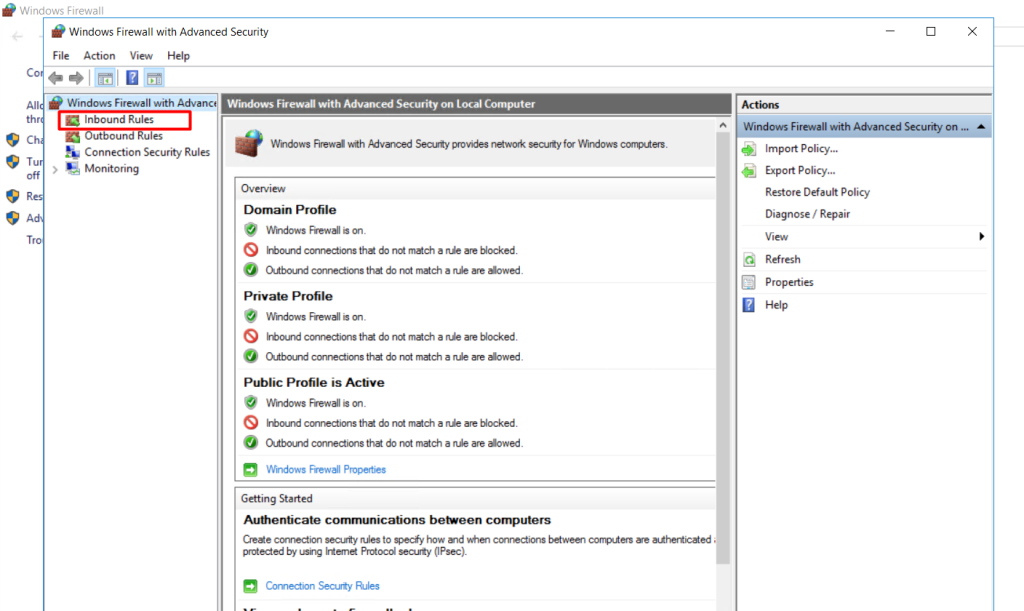
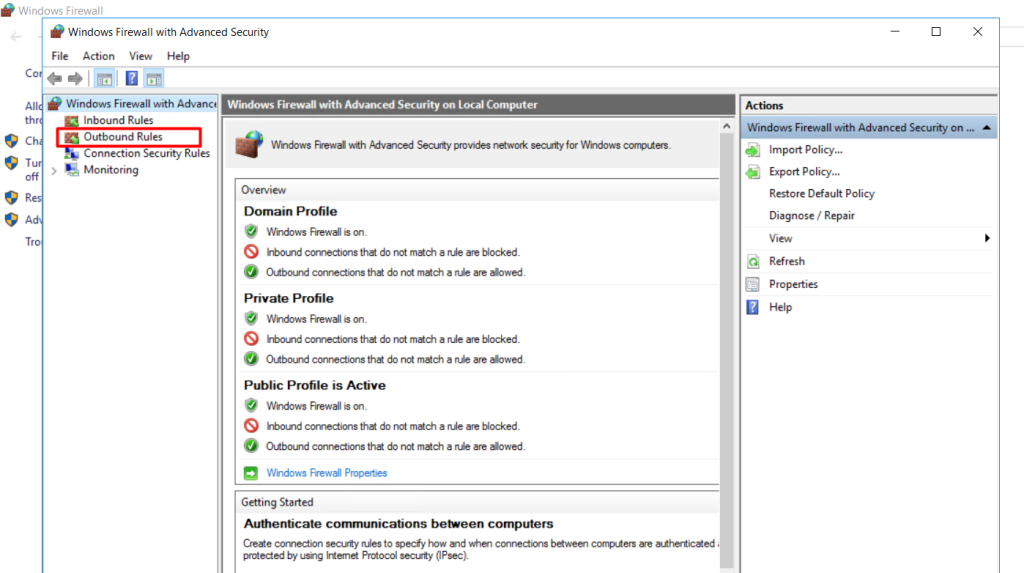
Select Inbound or Outbound Rules:
To add an IP address-based rule for inbound connections (incoming traffic), click on “Inbound Rules” in the left-hand pane.
To add an IP address-based rule for outbound connections (outgoing traffic), click on “Outbound Rules” in the left-hand pane.
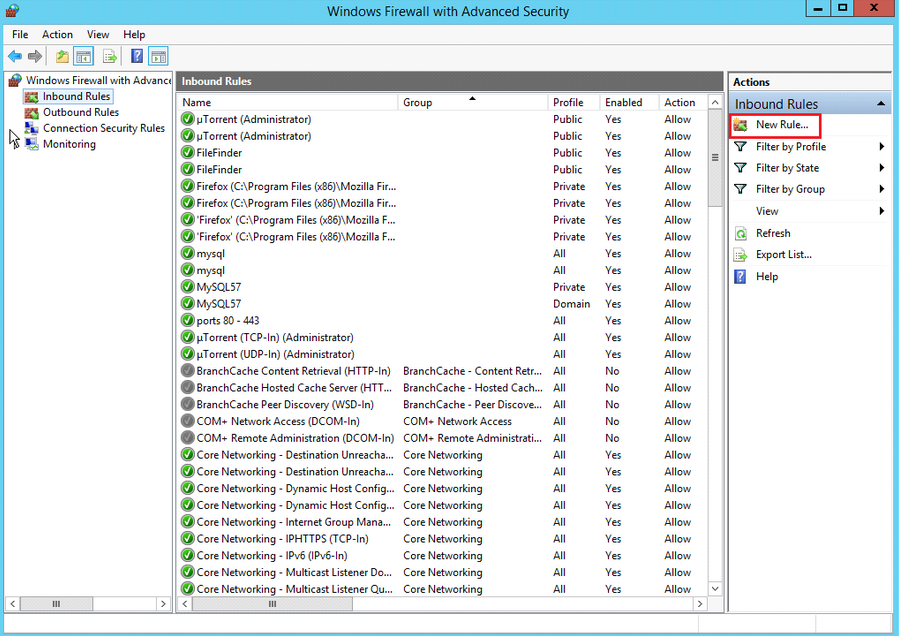
Create a New Rule:
In the right-hand pane, click on “New Rule…” This will open the New Inbound (or Outbound) Rule Wizard.
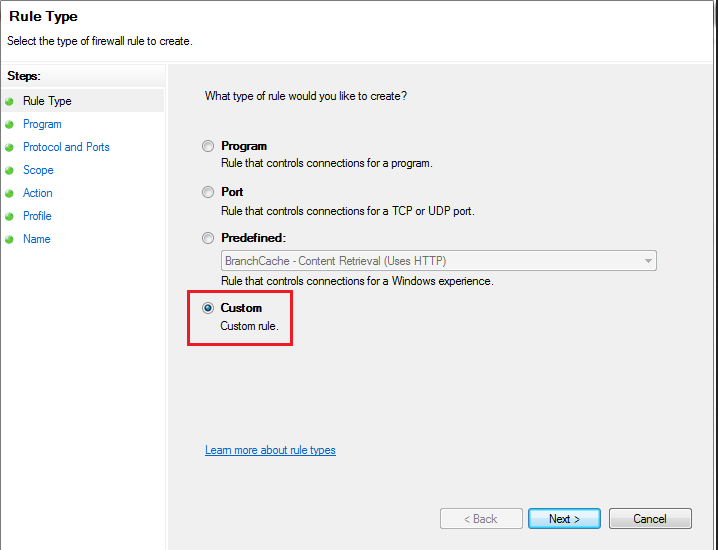
Choose Rule Type:
Select the rule type you want to create (Program, Port, Predefined, or Custom). For this case, select “Custom” and click “Next.”
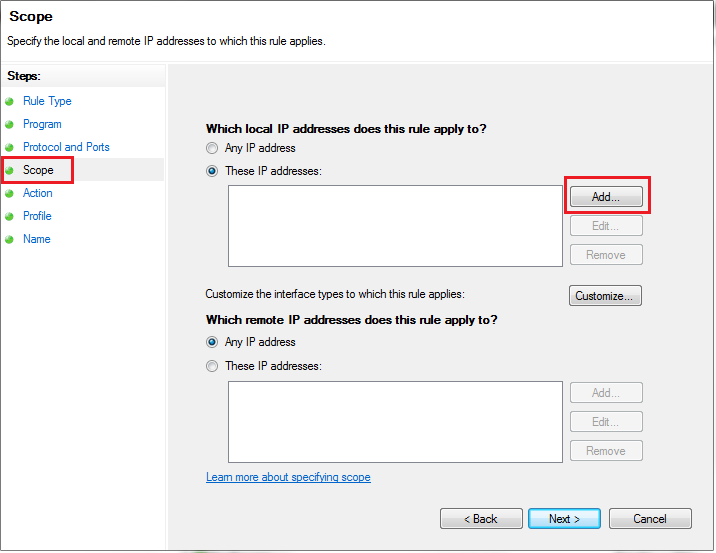
Choose Rule Scope:
Under “Which remote IP addresses does this rule apply to?” select “These IP addresses.” Click on “Add” to specify the IP address or IP range.
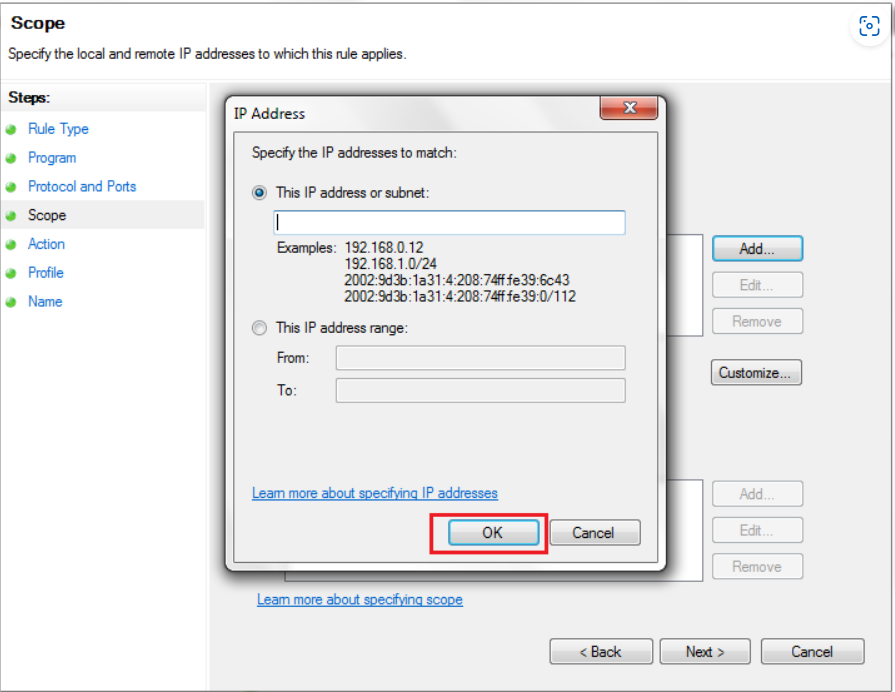
Specify IP Address or IP Range:
In the “This IP address or subnet” field, enter the IP address or range you want to allow or block. You can use specific IP addresses (e.g., 192.168.1.1) or specify a range using subnet notation (e.g., 192.168.1.0/24). Click “OK” after entering the address.
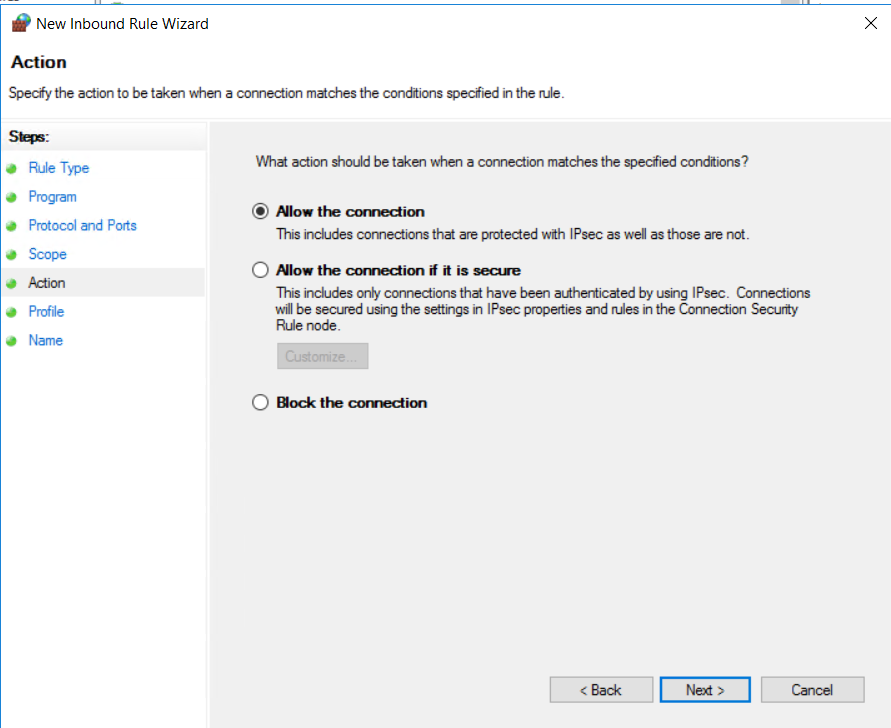
Choose Action:
Select whether you want to “Allow the connection” or “Block the connection” and click “Next.”
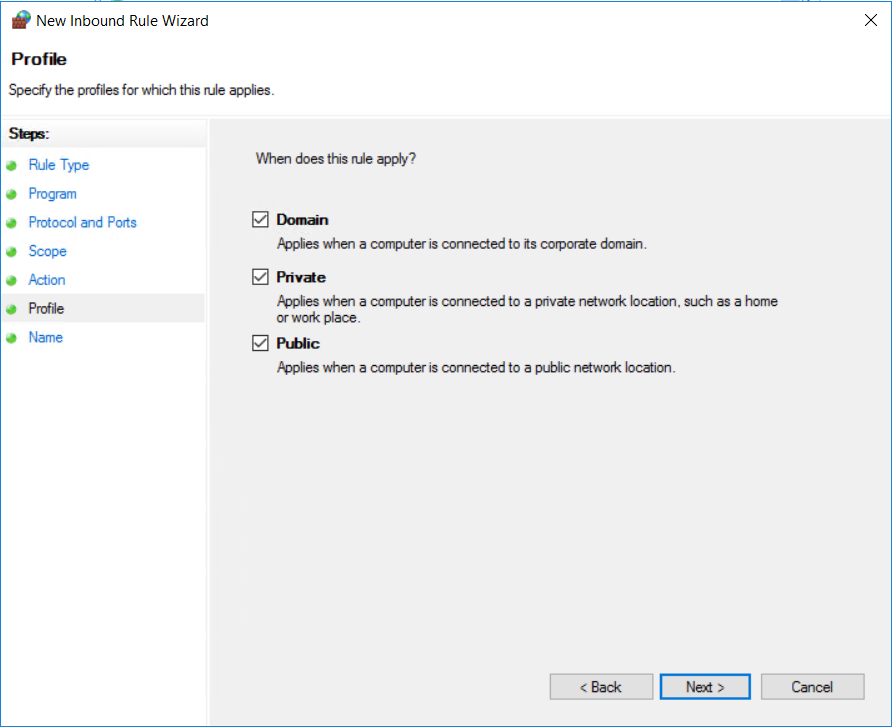
Apply Rule to Profiles:
Select when the rule should apply (Domain, Private, Public). You can leave all checkboxes checked if you want the rule to apply across all network types. Click “Next.”
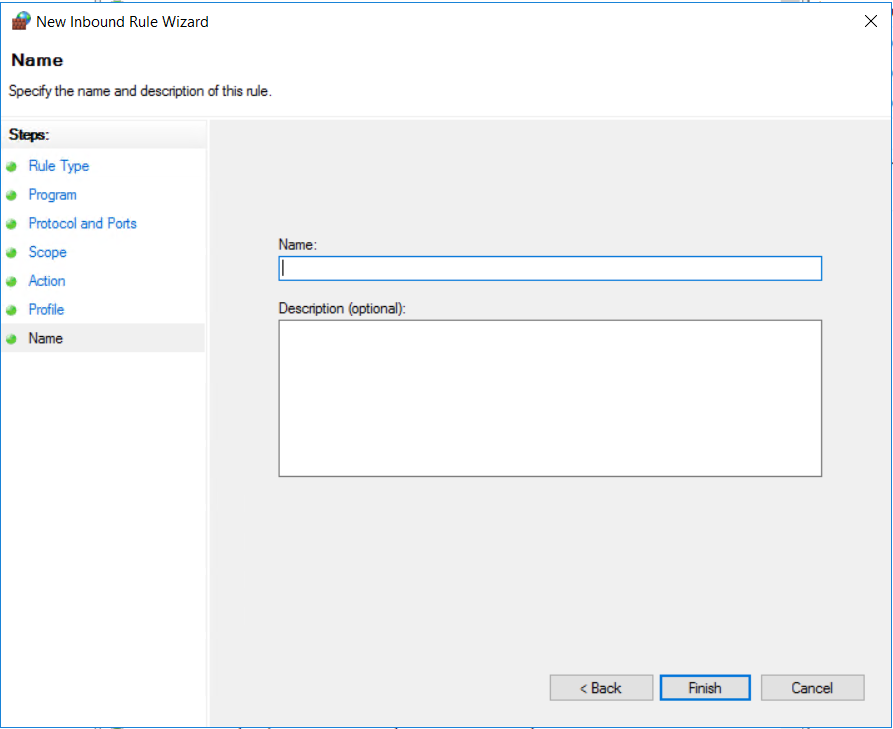
Name and Describe the Rule:
Provide a name and description for the rule to help you identify it later. Click “Finish” to create the rule.
After completing these steps, the Windows Firewall will now include the rule you’ve added, allowing or blocking the specified IP address or range based on your configuration.
Remember, managing firewall rules requires administrative privileges, so ensure you have the necessary permissions to make these changes.