Setting up your first website using DirectAdmin involves several steps, from purchasing a domain name and web hosting to configuring your website and uploading your files.
Table of Contents
Set Up Website Using DirectAdmin
Here’s a step-by-step guide to help you get started:
1. Purchase a Domain Name and Web Hosting
- Domain Name: Choose and purchase a domain name through a domain registrar (e.g., Chennai Hosting).
- Web Hosting: Purchase a hosting plan from a provider that offers Direct Admin as a control panel (e.g., A2 Hosting, Namecheap).
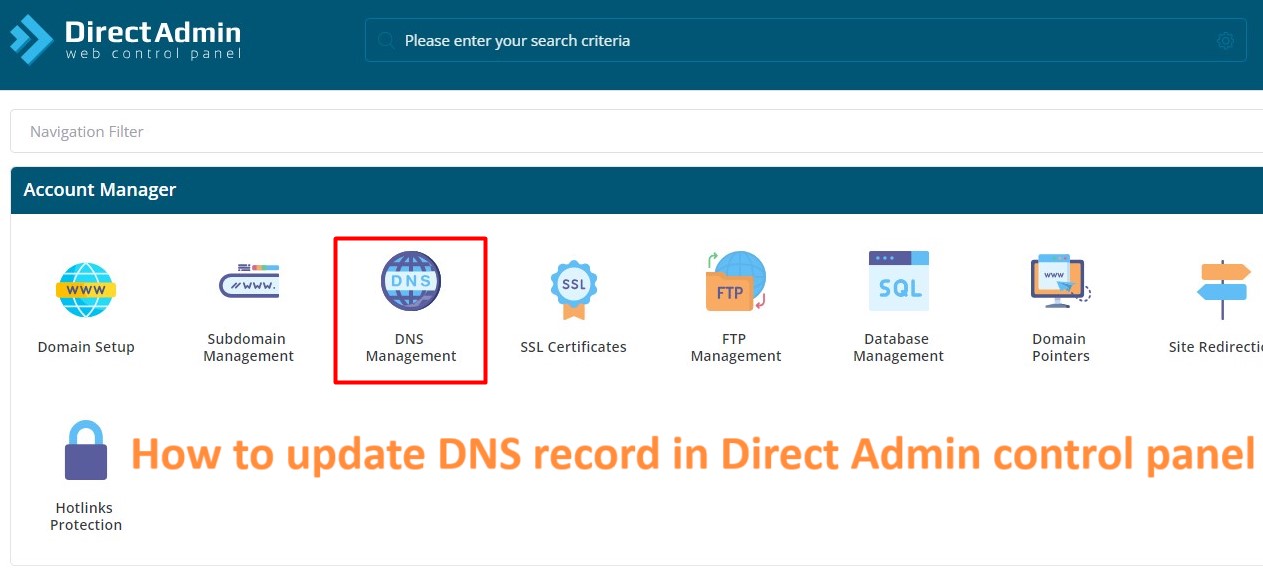
2. Access Direct Admin Control Panel
- After purchasing hosting, your provider will send you login details.
- Use these credentials to access Direct Admin, typically via a URL like
http://yourdomain.com:2222orhttp://yourhostingsite.com/directadmin.
3. Set Up Your Domain in DirectAdmin
- Log in: Enter your username and password.
- Add Domain:
- Go to Account Manager > Domain Setup.
- Click Add Another Domain.
- Enter your domain name and select any necessary options (e.g., Secure SSL, PHP).
- Click Create.
4. Upload Your Website Files
- File Manager:
- Navigate to Account Manager > File Manager.
- Open the
public_htmldirectory (this is the root directory for your website). - Click Upload Files and choose the files from your computer that you want to upload.
- FTP:
- Alternatively, you can use an FTP client like FileZilla to upload files. Use your domain as the host, your Direct Admin username and password, and port 21.
5. Create and Manage Databases (If Needed)
- If your website requires a database (e.g., for WordPress), you’ll need to create one.
- Go to Account Manager > MySQL Management.
- Click Create New Database.
- Enter a name for your database, a username, and a password. Direct Admin will generate a database with these credentials.
6. Install a CMS (e.g., WordPress)
- If you plan to use a CMS, Direct Admin makes it easy to install one.
- Go to Extra Features > Softaculous Auto Installer.
- Select the CMS you want to install (e.g., WordPress), follow the installation wizard, and configure your website settings.
7. Configure Your Website
- DNS Settings: Ensure your domain’s DNS is pointed to your hosting provider’s nameservers.
- SSL Certificate: Go to Account Manager > SSL Certificates and set up an SSL certificate (e.g., Let’s Encrypt) to secure your website.
- Email Setup: Set up email accounts for your domain if needed via Email Manager > Email Accounts.
8. Test Your Website
- Once everything is set up, visit your domain in a web browser to ensure your website is functioning correctly.
- Check that all pages load correctly, forms work, and any dynamic elements (e.g., contact forms, e-commerce functions) operate as expected.
9. Back Up Your Website
- Regularly back up your website to prevent data loss.
- Use the Site Backup feature under Account Manager or manually back up your files and databases.
10. Maintain and Update Your Website
- Regularly update your website’s content, CMS, plugins, and security settings.
- Monitor website performance and security through Direct Admin’s tools.
By following these steps, you’ll have your first website up and running using Direct Admin.